

When disaster strikes, thrive with our two-bucket emergency food storage plan! Over 73,000 calories of nutritious, shelf-stable food for 30+ days.
This system is designed to provide over 30 days of sustenance for one person, with recipes and meal plans that transform basic ingredients into satisfying and nutritious meals. Whether you’re new to emergency preparedness or seeking to optimize your existing storage system, this guide will help you create a practical and affordable food storage solution.
Why Two Buckets Work So Well
The two-bucket system offers several advantages for emergency food storage:
- Portability: Each bucket weighs a little over 25 pounds when full, making them easy to transport.
- Organization: Separating proteins from grains/carbs/seasonings makes meal planning intuitive.
- Space Efficiency: Fits in most storage areas, including apartments and small homes.
- Cost-Effective: Uses affordable, bulk ingredients with long shelf lives.
- Balanced Nutrition: Provides complete proteins, essential fats, and complex carbohydrates
Bucket 1: Protein & Fat
This bucket contains your primary protein sources and essential fats:
Proteins and Fat:
- Freeze-dried chicken breast: 14 oz (1,960 calories)
- Freeze-dried seasoned beef patty crumble: 18 oz (3,240 calories)
- Pinto beans: 4 lbs (6,272 calories)
- Black beans: 3 lbs (4,704 calories)
- Red beans: 3 lbs (4,704 calories)
- Lentils: 3 lbs (4,704 calories)
- Freeze-dried eggs: 1 lb (2,500 calories)
- Powdered milk: 1 lb (1,600 calories)
- Coconut oil (glass jar): 14 fl oz (3,360 calories
We got the freeze dried meats from Nutristore. They are a great source for clean, freeze-dried foods. Use the promo code PROVIDENT to receive a 15 percent discount.

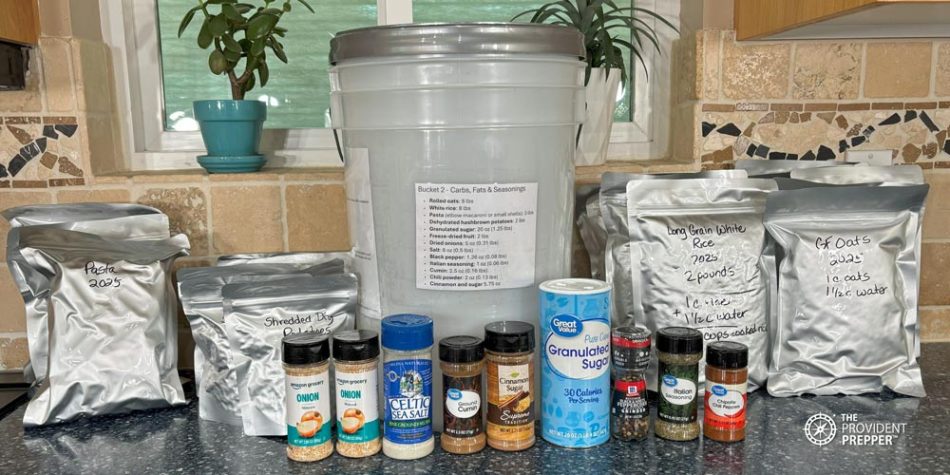
Bucket 2: Carbs, Grains & Seasonings
This bucket provides energy-dense carbohydrates and flavor enhancers:
Grains and carbohydrates:
- White rice: 8 lbs (13,184 calories)
- Rolled oats: 8 lbs (13,600 calories)
- Pasta: 3 lbs (4,800 calories)
- Dehydrated hashbrown potatoes: 2 lbs (3,200 calories)
- Granulated sugar: 20 oz (2,188 calories)
- Freeze-dried fruit: 2 lbs (3,000 calories)
Seasonings & Extras:
- Dried onions: 5 oz
- Salt: 8 oz
- Black pepper: 1.26 oz
- Italian seasoning: 1 oz
- Cumin: 2.5 oz
- Chili powder: 2 oz
- Cinnamon and sugar 4 oz
Nutritional Analysis
Total System: Approximately 73,000 calories
Duration Options:
- 29 days at 2,500 calories per day
- 37 days at 2,000 calories per day
- 49 days at 1,500 calories per day
Daily Macronutrient Balance (2,500 calories):
- Carbohydrates: 1,500 calories (60%)
- Protein: 500 calories (20%)
- Fats: 500 calories (20%)
Key Nutritional Benefits
This system provides complete nutrition through strategic food combinations:
- Complete amino acid profile from the beans and rice combination
- Essential fatty acids from coconut oil
- Vitamins and minerals from freeze-dried fruits
- Calcium from powdered milk
- Complex carbohydrates for sustained energy release
- Fiber from beans, oats, and whole grains
Simple, Satisfying Meal Recipes
Breakfast Options
1. Hearty Oatmeal Bowl (450 calories)
- 1 cup rolled oats
- 2 tbsp powdered milk
- 1 tbsp sugar
- 1 tsp dried fruit
- 1 tsp coconut oil
- Pinch of salt
Instructions: Boil 2 cups water with salt, add oats and dehydrated fruit. Simmer 5 minutes. Stir in remaining ingredients.
2. Protein-Packed Scramble (520 calories)
- 1/4 cup freeze-dried eggs (rehydrated)
- 1 tbsp coconut oil
- 1 tsp dried onions
- 1 cup rehydrated hashbrown potatoes
- Salt and pepper to taste
Instructions: Rehydrate eggs and onions separately. Heat coconut oil, cook potatoes until crispy, add eggs and onions, scramble together. Salt and pepper to taste.
3. Sweet Breakfast Rice (480 calories)
- 1 cup cooked white rice
- 2 tbsp powdered milk
- 1 tbsp sugar
- 1 tsp coconut oil
- 1 tbsp dried fruit
Instructions: Reheat rice with small amount of water, stir in milk and sugar, add coconut oil and top with rehydrated fruit.
Dinner Options
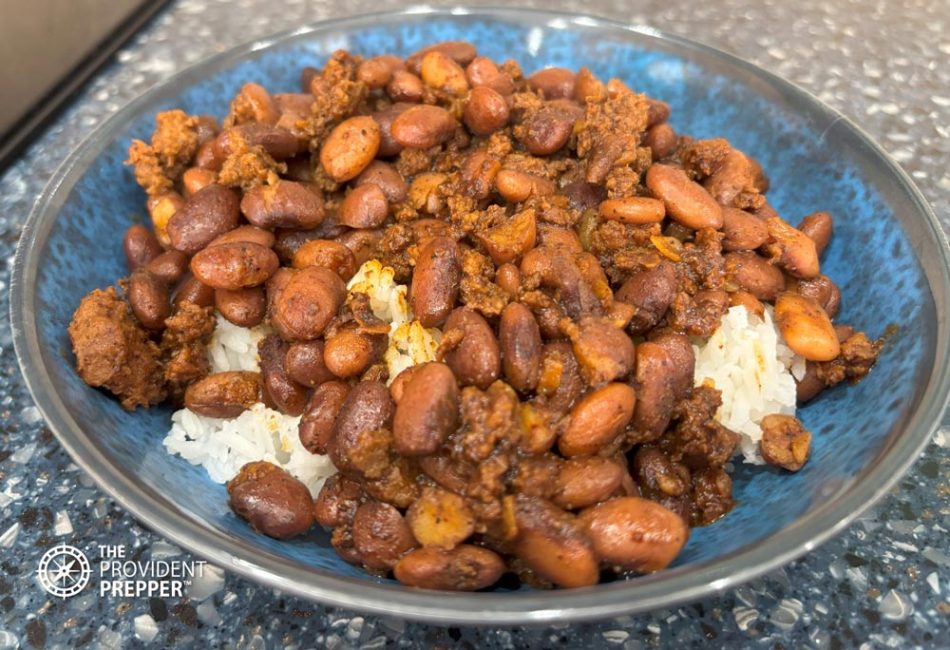
1. Classic Bean and Rice Bowl (550 calories)
- 1 cup cooked white rice
- 3/4 cup cooked mixed beans
- 1 tsp coconut oil
- 1 tsp dried onions
- 1 tsp cumin
- 1 tsp chili powder
- Salt and pepper to taste
Instructions: Cook rice and beans separately (soak beans overnight). Rehydrate onions, heat coconut oil, add onions and spices, then beans. Simmer 5 minutes and serve over rice.
2. Beef and Rice Skillet (570 calories)
- 1 oz freeze-dried beef patty crumble (rehydrated)
- 1 cup cooked white rice
- 1/2 cup cooked pinto beans
- 1 tbsp coconut oil
- Seasonings as desired
Instructions: Rehydrate beef according to package directions. Heat coconut oil, add beef and seasonings, cook 2 minutes. Add beans with small amount of liquid, simmer 5 minutes, serve over rice.
3. Hearty Potato Hash (580 calories)
- 1 cup cooked hashbrown potatoes
- 1/2 cup cooked black beans
- 1 oz freeze-dried chicken breast (rehydrated)
- 1 tbsp coconut oil
- Seasonings as desired
Instructions: Rehydrate potatoes and chicken separately. Heat coconut oil, add potatoes and cook until golden. Add chicken, beans, and seasonings, cook together 5-7 minutes.
4. Hearty Beef and Bean Pasta (560 calories)
- 1 cup cooked pasta
- 1 oz freeze-dried beef patty crumble (rehydrated)
- 1/2 cup cooked red beans
- 1 tbsp coconut oil
- 1 tsp Italian seasoning
- Salt and pepper to taste
Instructions: Rehydrate beef and onions. Cook pasta and drain. Heat coconut oil, add beef and seasonings, cook 2 minutes. Add beans with cooking liquid, then pasta. Toss together and simmer until heated through.
Package Correctly for the Best Quality Shelf Life
Package the dry goods in Mylar bags with oxygen absorbers. We recommend PackFreshUSA. Use the promo code PROVIDENT to receive 10% off. They sell kits that will have the correct size oxygen absorbers for whatever size bags you choose. We used both pint and quart sized in these buckets. Be sure to heat seal the Mylar bags closed with an impulse sealer or I use my hair straightener. It works great.
I purchased coconut oil from Amazon in a glass jar for the longest shelf life then sealed it inside of a Mylar bag to make certain it didn’t leak and ruin the other contents in the buckets. I left the sugar, salt, pepper, and some of the spices in the original packaging.
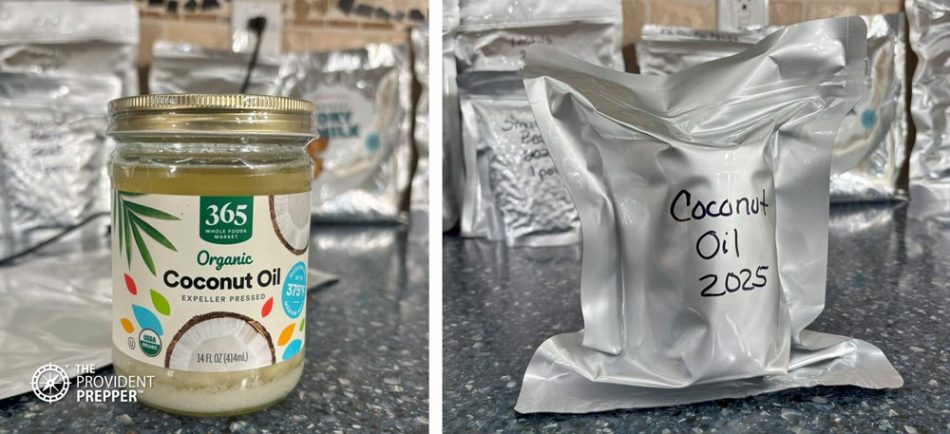
Be certain to label the contents and include the packing date. I put copies of the recipes inside of the bucket in a small ziplock bag. I also taped them on the outside of the bucket along with everthing the bucket contains. We chose to use gamma seal lids on the buckets for easy access.
Double or Triple Shelf-Life in Ideal Storage Conditions
- Store in cool, dry location away from direct light. The cooler the temperature, the longer the shelf life. Do not allow the bucket to freeze. Maintain consistent temperature when possible. Avoid storing in a garage.
- Keep off concrete floors to prevent moisture issues.
- Rotate stock every 5-10 years even with 20-year shelf life when possible so there are never any surprises. You know what’s in the bucket, you keep it fresh, and you know how to cook it.
Make Certain to Have Enough Water Stored
You will absolutely need water to use these buckets. Be sure to store clean drinking water and have a way to collect and purify more if needed.
- Plan for 1-2 gallons per person per day for drinking.
- Additional water needed for food preparation and cleanup.
- Consider how you will obtain and purify water from questionable sources. Check out these posts for ideas: Making Water Safe to Drink: 7 Disinfection Techniques or Emergency Water Filters: Guiding You Through the Maze.
- Store water in food-grade containers and rotate regularly. Learn more about water storage in these posts: How to Store Water for Emergency Preparedness, Rockwell Water Storage Tanks: Your Go-To solution for Emergency Preparedness and Beyond and Tips for Storing Water in a 55 Gallon Plastic Barrel.
Beyond the Basics
Once you have your two-bucket system established, consider these enhancements:
- Additional spices and seasonings for variety
- Comfort foods like chocolate (I definitely have this in mine!)
- Fresh additions like sprouting seeds for vitamins
- Cooking equipment optimized for grid-down situations
Final Thoughts
This two-bucket emergency food storage system provides a portable foundation for emergency preparedness. With 73,000+ calories of nutritious, shelf-stable food, you’ll have the peace of mind that comes from knowing you can feed yourself or your family during uncertain times.
The beauty of this system lies in its simplicity and effectiveness. By focusing on nutrient-dense, versatile ingredients and proven food combinations, you create a storage system that’s both practical and sustainable. Best of all, you build it yourself and can design it to fit your needs.
Remember, the best emergency food storage plan is one that you’ll actually use and maintain. Start with this foundation, practice the recipes, and gradually expand your system based on your family’s needs and preferences.
Your future self will thank you for taking this important step toward self-reliance and preparedness. Stay safe, stay prepared, and remember – it’s better to have it and not need it than to need it and not have it.
Thanks for being part of the solution!
Jonathan and Kylene Jones